
A small note to self. Where volunteering to help build terrain for a show game for the first time START SMALL!
As an active member of the Frothers Unite forum I was well aware of the previous efforts the group had gone to in putting on games at the Salute wargame show in London. So when this years ideas were floated I rashly volunteered to take part. The premise behind the game was to make the Cluedo board game as a 3D model with an inspired by HP Lovecraft’s Cthulhu Mythos. The board would consist of 11 rooms in total, each room made by a individual Frother member. The logistics to assemble a game based on a high number of pieces being made independently of each other was not lost on the group.
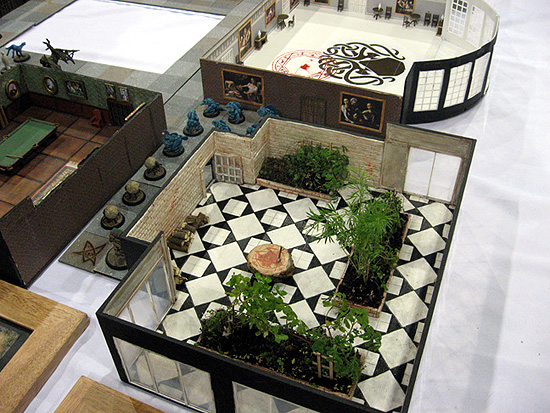
I agreed to make the conservatory even though I had never made any terrain beyond the odd wall, fence or a few fortifications for 6mm scale games. To help with some uniform approach to the board Fenris Games agreed to create basic room kits. This helped us to keep the room dimensions correct, an essential part of this project. But the rooms would just be a shell requiring each member to set about creating a suitible interior for the game.
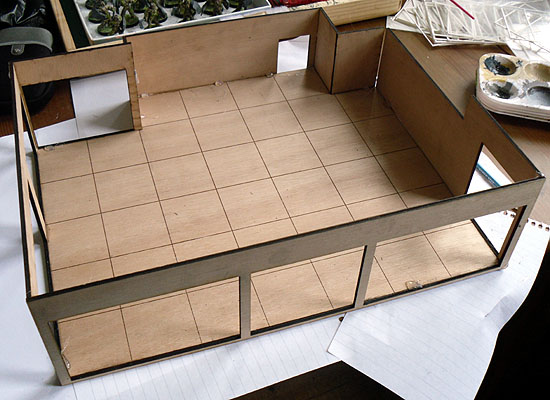
The first stage was to put the wooden kit together. The parts went together very well (good work Fenris!) but the amount of surface area available to glue the parts together was only 4mm.
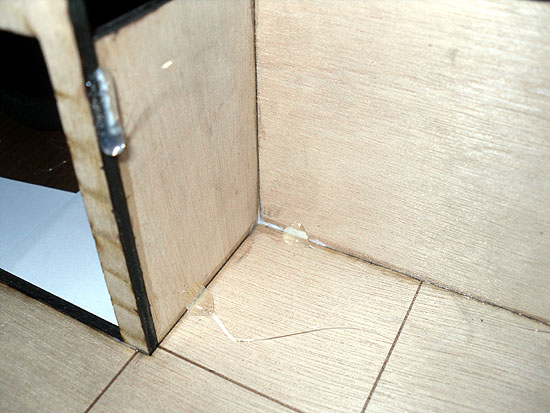
Because the kit was wooden I went for standard PVA based wood glue. Lots of suggestions were made as to how to clamp or fix the pieces together, but in the end I opted to use my hot glue gun. I stuck the pieces together and put a blob of hot glue on the join to hold them in place. This actually worked really well and the glue was easy to remove with a sharp knife once the wood glue had set.
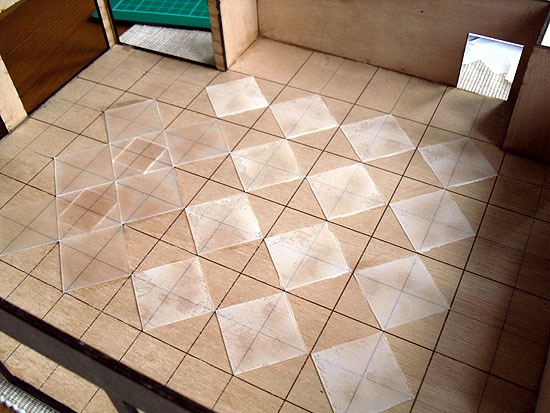
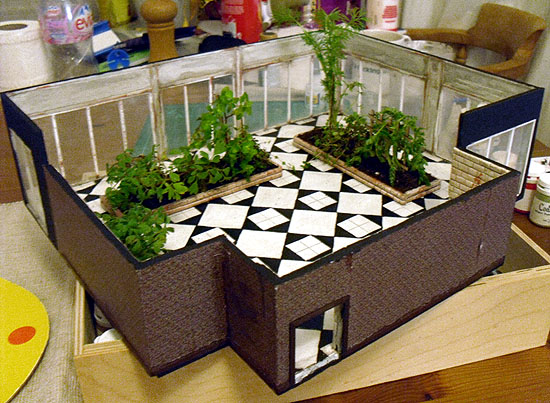
I started on the floor next. Looking at several victorian style tile patterns I settled on a pattern that had a mixture of squares and diamonds. From the start I intended on painting the design in black and white. Wanting to do this on the cheap I found some plastic card in an art shop. Unfortunately it was transparent so would be hard to see the pattern until painted. I cut up the card according to a life size print out of the intended pattern and begun sticking it down. You can see I also drew pencil guide lines to give me a better chance of lining up the tiles. Part of me did think I should have kept the card whole and have just scored the pattern onto it. Might have been quicker.
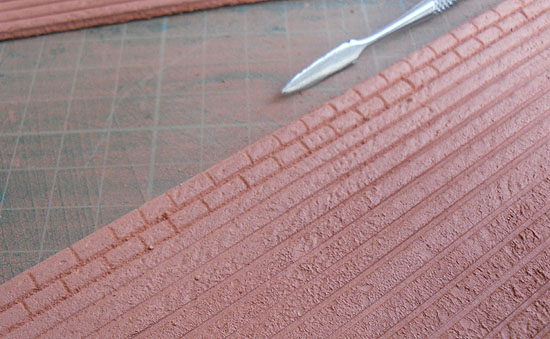
Once the floor was completed I turned to the walls. I looked at lots of pictures of victorian manor houses with conservatories, one clear aspect was of the inner wall of the house forming part of the conservatory and the the outer wall of glass and steel, like a greenhouse. For the interior wall I knew from the start I wanted a victorian red brick wall painted white. So I bought some DAS air drying clay. I’ve used the clay to make some miniature bases but because it is air drying any parts not exposed to the air take forever to dry out. So for the brick wall I made some thin flat sheets of it and let one side dry, I then turned it over to dry the other side. Next I took a ruler and one of my sculpting tools and scored along the clay in lines. It was then a case of scoring smaller lines in a brick like pattern.
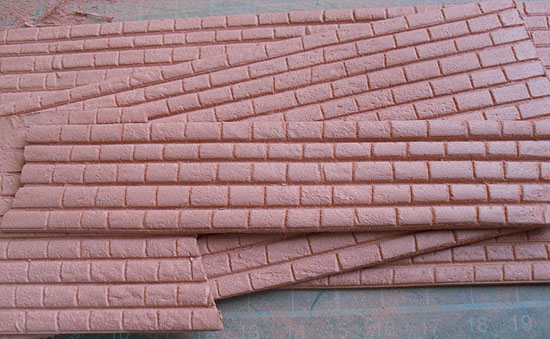
Once I felt I had enough bricks to cover the interior parts of the conservatory I started to apply it to the walls like wallpaper. I needed to use a file to smooth out some of the edges where the sheets of brickwork joined together but the clay is easy to sand or file away. I stuck the clay up with the same PVA glue I used to stick the room together.
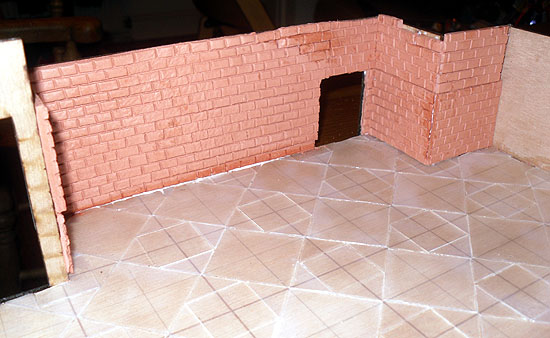
The brickwork stuck very well and really started to show the effect I was after. I wasn’t worried about the bricks not looking very uniform or if there were a few gaps. Most victorian buildings I’ve seen were a bit slap-dash relying on plaster or wallpaper to as they say paper over the cracks!
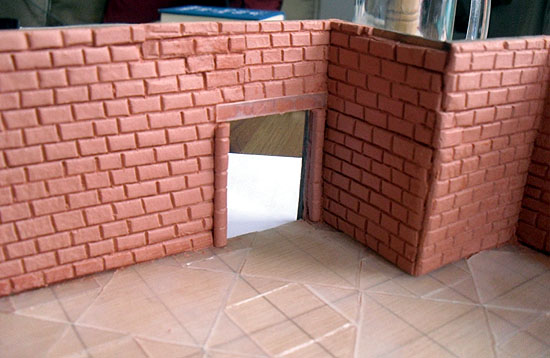
I then added some decoration to outline the door and I filed down the tops of the brickwork so it was flush with the top of the kit wall. For the actal door. I left that for a later as it would be glass panelled and open. So would have got in the way of any painting.
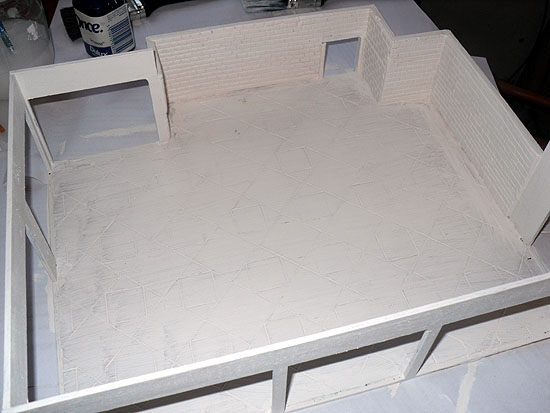
The conservatory was probably the largest model I’d ever painted. So rather than break open my normal pots of miniature paint, a quick trip to the cellar and I returned with a pot of Dulux ‘Once’ paint. I simply painted the whole model in the white paint. It went on very well with good coverage. Next up decided to put the windows in. These were made up of an inside and out side frame with a piece of clear plastic in between.
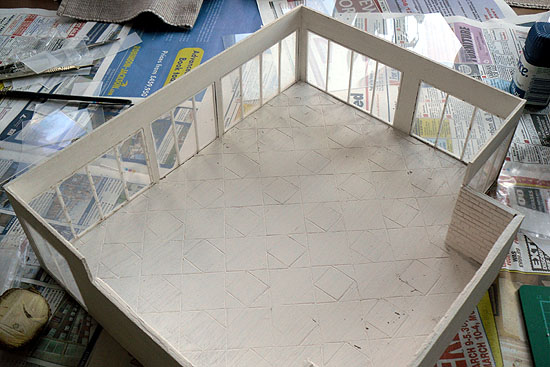
I used superglue to stick the windows together and despite my best efforts I did get some of the glue on the windows. Luckily the conservatory was supposed to be in a haunted rundown house and so blemished windows wouldn’r be out of place. It was at this stage that I also felt there was something missing from the walls with the windows. The brickwork had added a lot of detail to the interior walls but the other walls looked to bare.
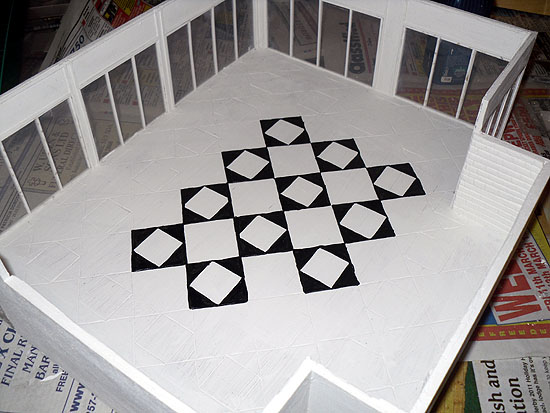
To make the exterior walls look better I cut some very thin strips of plastic card and stuck it on the walls around the windows to make it look more like a frame work with panels. As you can see I also started to paint the floor tiles. Despite the tiles having clear definition my freehand painting skills were pushed to maximum.
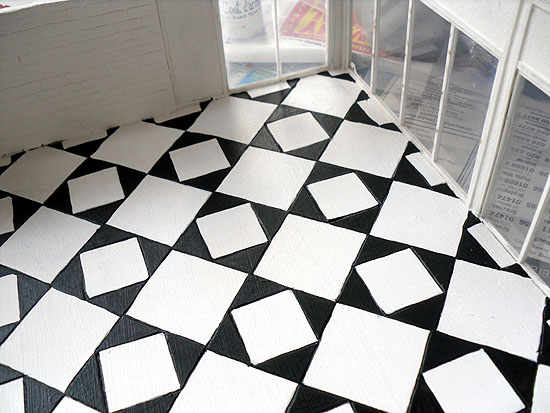
After quite a while (had to do the floor tiles in two sittings) the floor was finished and didn’t look too bad. You can also make out the frame work I added round the windows. Of course at this point the whole conservatory looked more like a wing of the local hospital. It was far too clean! So the next process was to trash the place.
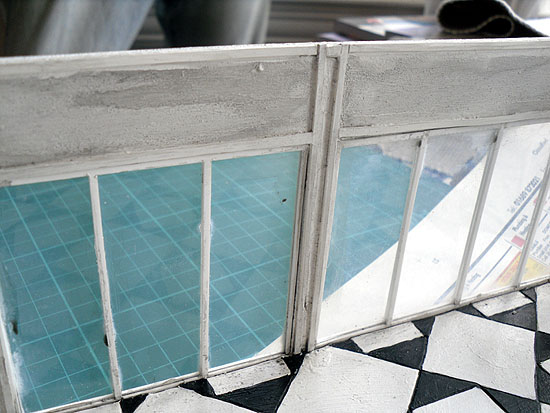
To start with I applied a thin black ink wash to the floor and walls. I was fairly uneven with it on purpose because I wanted to create the idea of stains.
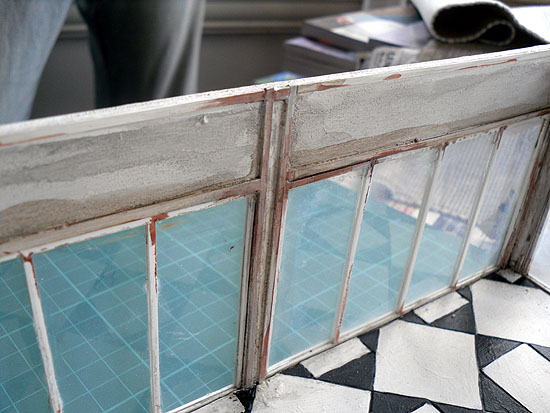
I then painted on Coat d’arms rust coloured paint along the framework of both te windows and the upper bits I’d added. This I followed up with a brown ink wash to blend the rust paint in bit more. I let the ink washes run down the model and collect in pools to give the conservatory that old used (and unlean) look.
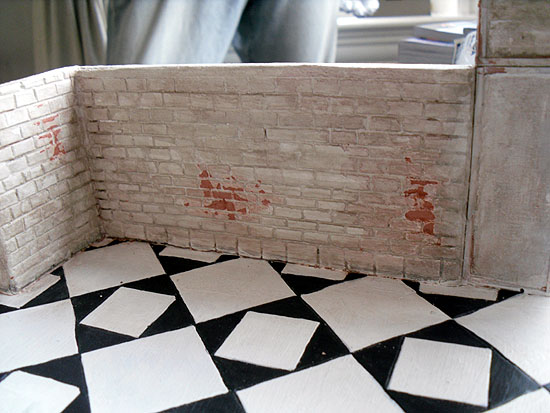
Having applied the washes to the brickwork as well I started to scrape of some of the paint thus revealing the beauty of using the terracotta coloured clay.
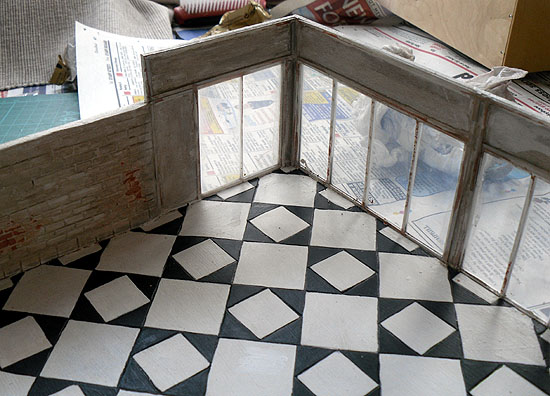
All of those touches blended together well to make the conservatory look the way I wanted it to. They are very simple techniques for making things look rusty, old and used.
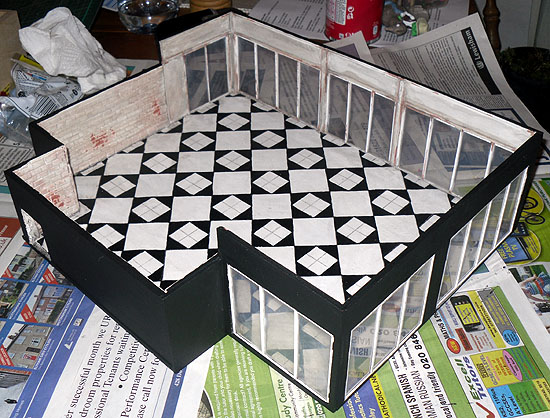
The last stage was to paint the outside of the conservatory. This was done black to match all the other rooms being painted for the game.
For the last stages of making the conservatory I needed to sort out the interior. Sticking with my idea of doing this project on he cheap, for the conservatory plants I had the idea of using real plants. Possibly a mad idea and as it turned out, not without its problems.
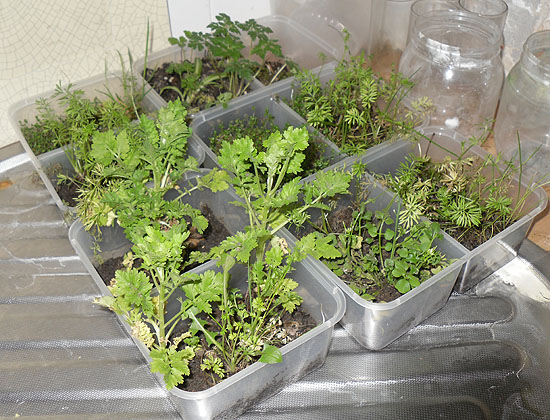
The plants I chose were simple weeds, but I tried to pick ones that had small leaves to try and get them to match the 28mm scale. In theory the plants would only need to survive 24 hours since the conservatory only had to look it’s best at the SALUTE show (2011). Even so I ran a test batch a couple of weeks before the show to see which plants survived the best.
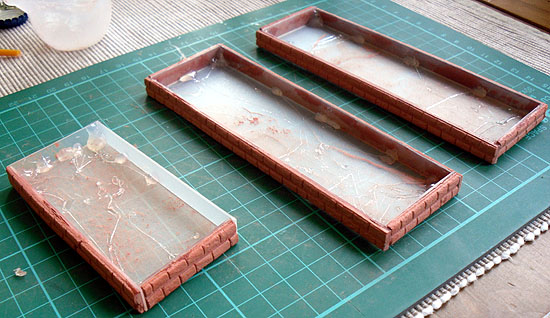
Because I went with real plants I needed to make the planters like real flower beds able to hold a layer of soil and be water tight so that I could water the plants if required. For this I used more of the plastic card and created three cradles and lined them with the remaining brickwork I had. The benefit of making the flower beds separately was that they could be repositioned for different layouts in the conservatory.
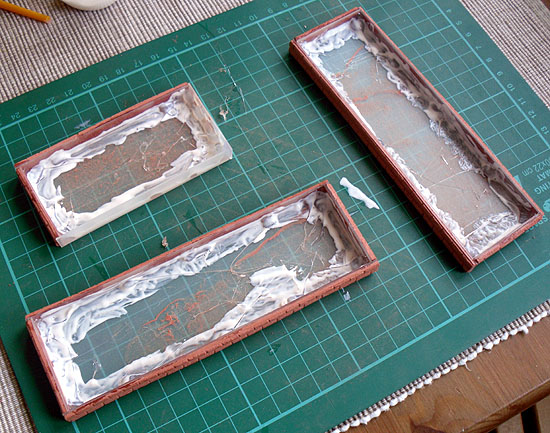
As previously mentioned I wanted the flower beds to be waterproof and so spread some more of the PVA glue around the joins. I then painted them the same as I had done the interior wall of the conservatory.
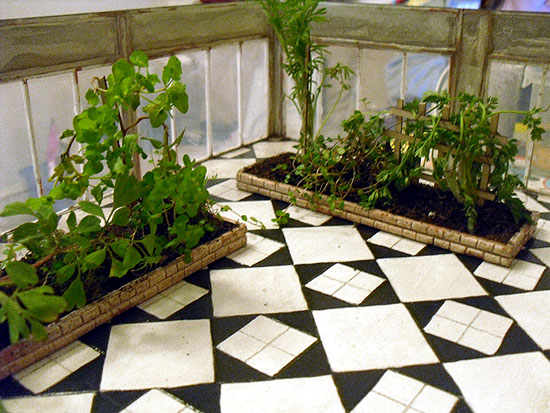
Then I had a bit of a disaster. The finished flower beds looked great but the problem I encountered was al my test plants were planted in soil an inch deep. The conservatory flower beds were only 10mm deep. I simply had forgotten this aspect of using real plants. So to get round this I stuck in some suports to rest the plants against. For the taller ones I even glued or tied then to the supports.
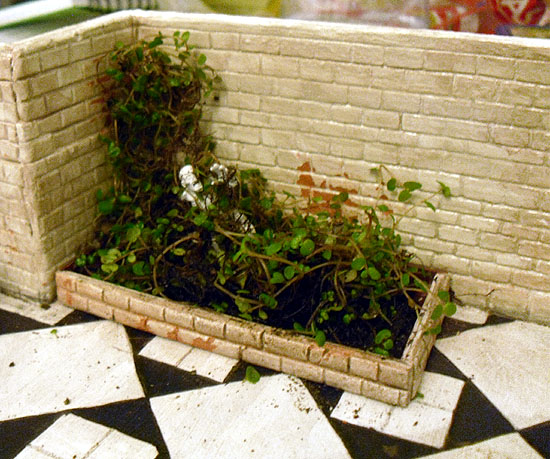
Because the theme for the game was spooky, haunted and monster infested I dug out some old Games Workshop zombies I had and tested using them as victims. In the end I painted two zombies up and positioned them tangled up in the flower beds.
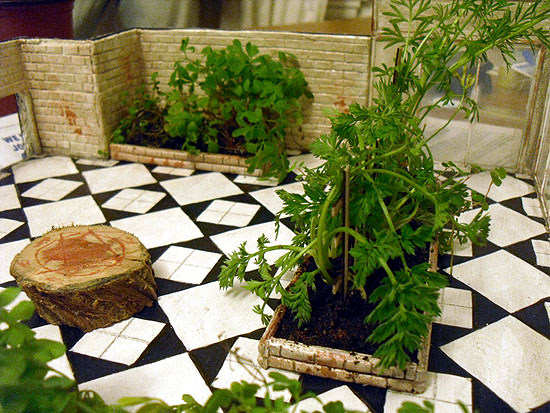
With the plants all done I started to add some more scenery pieces. First up was a tree stump that I fashioned as a sacrificial alter. I wanted to make a victorian style park bench but ran out of time and so just added piles of chopped logs.
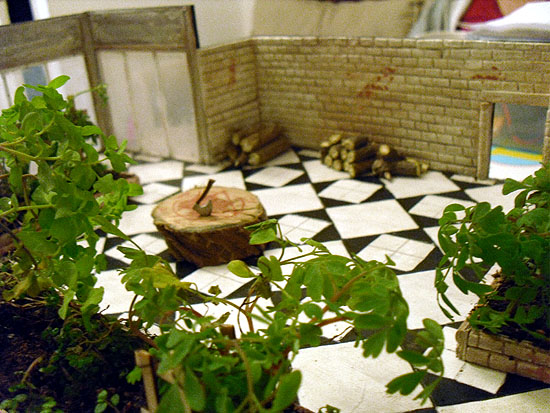
The very last stage of building the conservatory was to add wall paper to the part of the model that would form the inside of the whole manor house. The wallpaper was choosen by one of the other room builders and sent out to everyone else to make sure it was uniform. I hate wallpapering but this was easy and I was able to make a few mistakes which just looked in keeping with the rest of the model.
And so to the finished model. Unfortunately I don’t have a picture of the whole mansion apart from the image at the top of the page.
I think the achievement of Frothers members in creating 11 different rooms in isolation and being able to bring it altogether on the day was superb. And I was very pleased with my effort and look forward to doing another project.