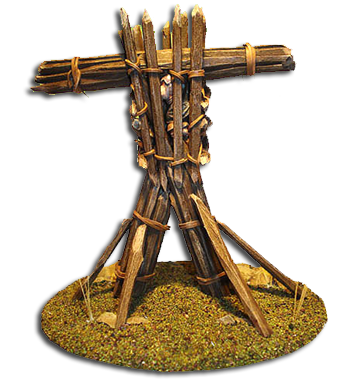
The idea of the Wickerman isn’t exactly a well documented Celtic religious object, but seemed perfect for my armies of the Undead. What with all that burning sacrifices and the like.
So I did some research for pictures of how the Wickerman is supposed to look, but all I found were pictures of the wickerman in the 1970’s film of the same name. I didn’t like that one because it was too ordered and square. Mine had to look like crazed, evil, undead things made it. So I went for a more lashed together on the quick look 🙂
Much like my article on the Hell gate this is not so much a “How to make” but more of a “How I made” guide to making wargame scenery.
I spent a lot of time pondering on how to actually make the Wickerman. In the end I actually made it as if I was making one for real (without the sacrifices of course ;).
That is I bought a Balsa wood bundle for £1.99 from my local craft shop and set about cutting up lengths of wood for the frame of the Wickerman.
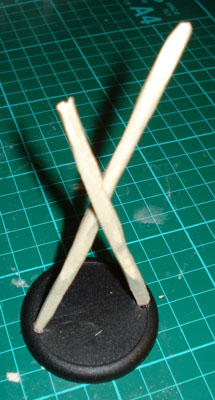
I started with a frame as you can see in the first picture. I cut straight lengths of wood and used the craft knife to round off the edges to make it look like an axe had been used to chop up the wood.
The frame poles are different lengths intentionally, as I said previously I was going for a rough un-ordered look.
As ever when using knives, cut away from yourself and be careful!
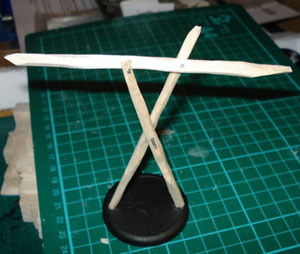
I used superglue to stick the frame together. The bond wasn’t bad but a firm tug would separate the joints and given the softness of the wood I had to be careful when handling the structure. To strengthen the frame I drilled a hole through the cross piece and glued in place a piece of wire.
I then added a beam across the top for the arms of the Wickerman.
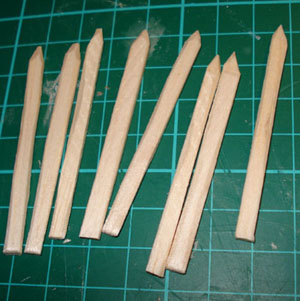
Once I had cut the frame I then spent time cutting up loads of smaller logs that I could attach to the frame. I used the same method of rounded the logs off with the knife and i sharpened the ends to a point to look like sharpened stakes. It’s meant to have been made by evil people remember 🙂
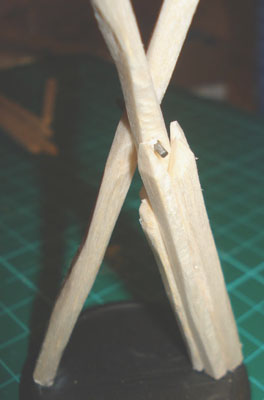
Adding these new shorter logs by sticking them with the super glue one by one to the frame legs I was starting to bulk out the structure.
This technique was pretty much how I would set about making a wickerman for real.
Without the superglue of course!
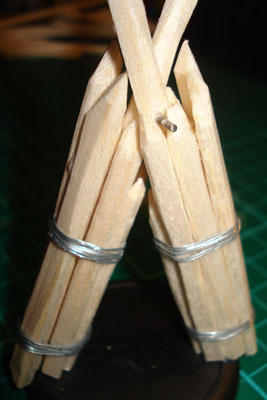
As you can see the process of adding the short logs around the frame worked well and gave a realistic look to the structure.
You can also see my first attempt at using some wire to make it look like the logs had been bound up with rope. Going back to the lashed together look the best example I could think of was of a log raft. The sort you see in island cast away films.
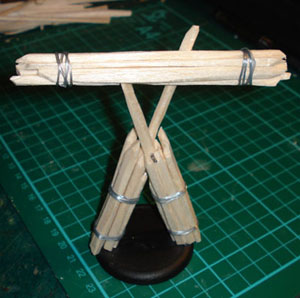
With the legs done I moved onto the arms. Cutting longer logs up this time I wanted them to span the whole length of the arms. Again same technique as the legs and bound with wire.
Because I added each log one at a time I was able to stick them around the top of the frame which helped to keep it strong and not look like the arms were perched on the top of the frame. You can see the frame poking out through the top of the arms.
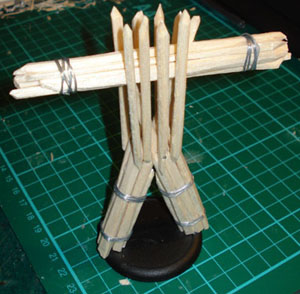
I then needed to turn my attention to the body of the Wickerman and a possible cage for the sacrificial victims. Also a head for the Wickerman started to play on my mind. In the end I went for a prison bar type cage and made the pieces tall enough that they would stick above the arms forming a rough human shape.
Also at this point it was becoming obvious that the 40mm round base I had stuck it to was just too small.
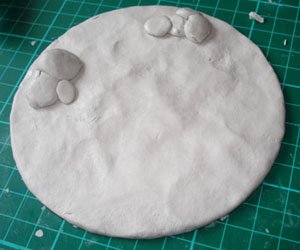
So in the same way as the Hell Gate, I used an old music CD and some modelling clay to make a bigger base. With the leftover bits of clay I made some rocks, as you can see from the picture to give the base some character. Before the clay dried I pushed the Wickerman Structure into it just to make an indentation that would help later when I would stick it to the base.
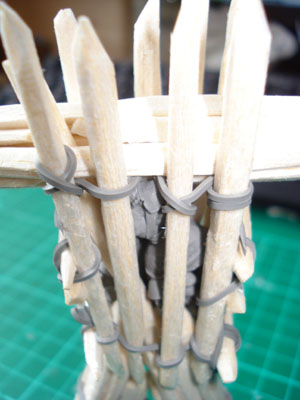
Ok at this point I sort of decided to change some parts and the structure got a little complicated.
First up came the victims for inside the Wickerman. I actually ended up sculpting parts of bodies in the same style as the existing Celtos miniatures. I’ve worked on a number of projects for Brigade Models who own Celtos and obtained permission to copy the style of their miniatures for this project.
But you could just as easily used old miniatures and just cut them up, so you can make it look like it contains a number of bodies.
In fact you could probably make it look more dramaticwith arms reaching out from the cage!
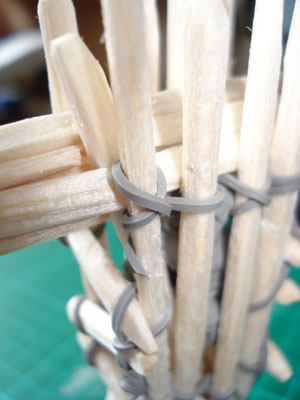
You will probably have also noticed that I had to take the cage beams off insert the victims and glue the cage back on 🙂
You will also have noticed that I ended up removing the wire I’d used for the bound together effect and re-worked the rope binding the Wickerman together using sculpted modeling putty.
I actually did this by rolling out flat some putty and once it had cured I cut it into thin strips and used it like real leather straps.
Threading the thin strips of putty through the structure I was able to really make it look tied together.
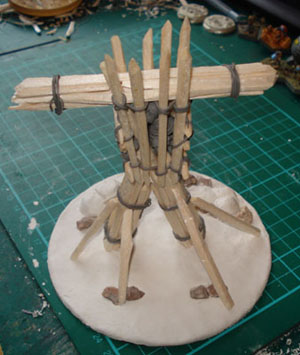
Adding a few more log beams to look like the Wickerman was being supported from falling over and a few more rocks the structure was complete.
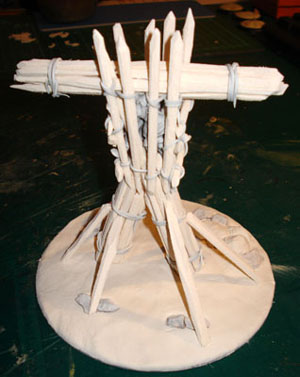
Now that the Wickerman was glued firmly to the base I sprayed the whole model with a white undercoat. The undercoat didn’t cover the wood too well but I knew it would be soaked up. But I didn’t want to smother the wood detail.
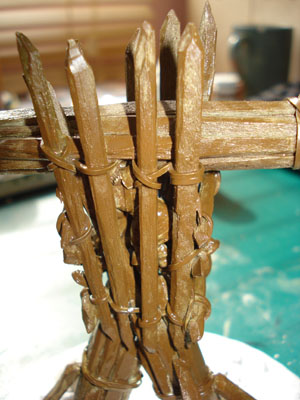
I then had a dilema about the colour of the wood. I had Coat d’Arms paint 218 Wood Brown but it just looked to bright. So in the end I opted for colour 534 Dark Leather.
The whole model was painted including poking the brush into the chest cage and covering the victims.
I was very aware that I would have to try and paint the victims through the cage bars but would worry about that later. By covering them in the same paint as the rest of the model I was hoping I’d only have to highlight the parts showing through the bars!
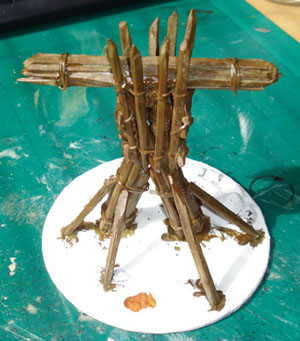
This is what the model looked like once completely covered. You can just make out a different brown colour on the base. This was the Wood Brown colour that I felt would have been too bright.
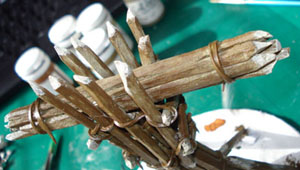
Once the base coat was dry I started to dry brush the entire model with colour 228 Buff. This was a little too bright so I mixed it with the Dark Lether for the first dry brush and lightened it a bit for a second layer.
I went back to the Buff colour and painted the chopped ends of the logs which had the lighter internal part of the wood showing.
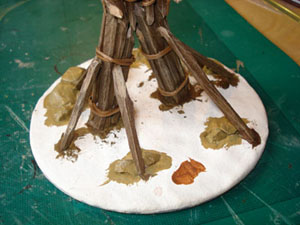
Next up I started painting the leather straps binding the Wickerman together. For this I used colour 116 Barbarian Leather. It contrasted well against the wood.
I also started on the rocks on the model base. These got a coat of 501 British Khaki and a dry brush of 517 Desert Yellow.
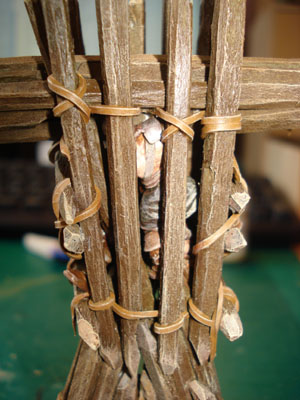
Now onto the last, you can see in the picture how well the leather straps came out against the wood and also how much of the real wood grain remained after several layers of paint.
I won’t lie to you and say painting the victim inside was easy, it wasn’t. I ended up having to touch up some of the wood that I got paint on while painting the victim. The victim it’s self was done by just dry brushing over the brown base coat the victim got at Step 13.
Given the difficulties I think painting the model and the victim before constructing the cage might have been a better idea?
And so the finished model complete with flocked base.
Quite frankly considering I started building this model with no experience of doing anything similar or a wealth of visual inspiration to aid me. It’s a miracle it came out the way it did!
I’d even go so far as to say it is probably one of the most unique models out there. There are more pictures of the Wickerman in my Scenery gallery and you will see it crop up from time to time in my Fantasy battle gallery.